Installation
For the IDE eclipse is a plug-in available which you can download and install with one of following options:
- Eclipse Marketplace
- Update site
- Manual
It is recommended to install JUnit-Tools via the Eclipse Marketplace or the update site.
Eclipse Marketplace
You can use the Drag and Drop install feature by dragging the  button to your running Eclipse workspace.
For example drop the install button to the toolbar or the package explorer of your running Eclipse. It doesn't work if you drop the button to the editor. With this way it is not necessary to open the Eclipse Marketplace and to search manually for the JUnit-Tools plug-in.
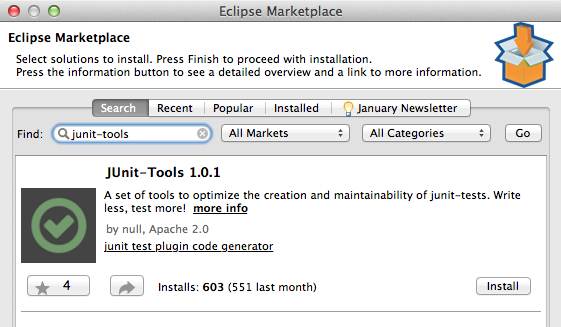
To open the Eclipse Marketplace select Help/Eclipse Marketplace... from your Eclipse menu. Then type "junit-tools" in the search field and select the result:
Update site
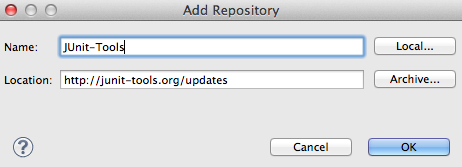
The update site link is http://junit-tools.org/updates.
To add the update site and download the plug-ins select Help/Install New Software... from your Eclipse menu.
Click Add... to add the junit-tools repository:
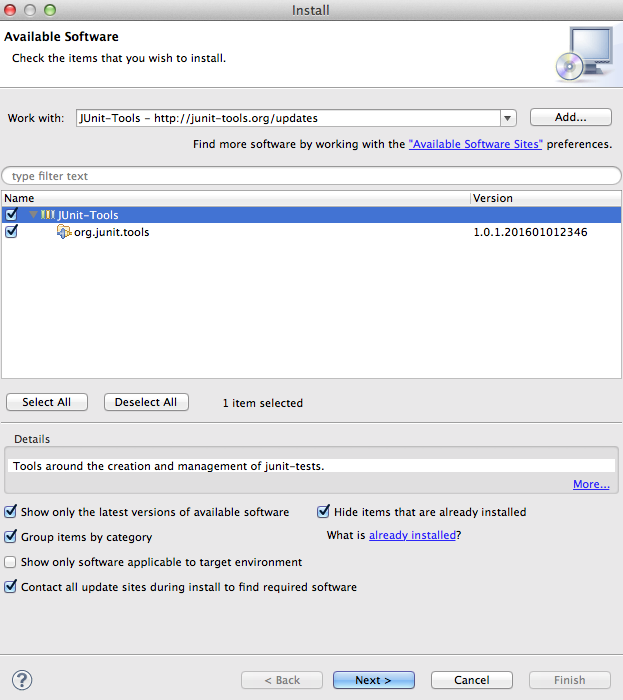
Check JUnit-Tools and start the installation:
Manual
Download the latest JUnit-Tools release and unzip the file in the plugins or dropins folder of your eclipse installation.
Configuration
First you have to check and/or set the preferences of JUnit-Tools and create the necessary test- and mock-projects with the correct settings and dependencies as described as follows. The test- and mock-projects must be created manually.
Preferences
To configure JUnit-Tools open the Eclipse Preferences and select the category JUnit-Tools. Here you can set your test-structure configurations for the test-projects and more.
The important defaults are as follows:
- The corresponding test-project for the project under test has the postfix
.test - The corresponding test-package for the package of the class under test has the same name
- The corresponding test-method for the method under test has the prefix
test - The mock-classes are saved in the project
org.junit.tools.mock

Create the corresponding test-projects and the mock-project manually.
Test-Project-Dependencies
For the generated test- and mock-classes two libraries are necessary:
junit-tools.jarjmockit.jar
You can download the libraries here: junit-tools-libraries.zip
Add the libraries to your test-project or test-base-project. For JMockit you can use a different version. In the zip-file the JMockit version 1.21 is included.
Example
Here an example for a workspace set-up:
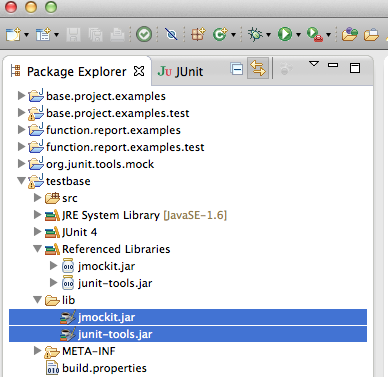
In the project testbase and the folder lib are the two necessery libraries for the test-projects added and referenced in the build path.
The testbase project is referenced by all other test-projects (base.project.examples.test and function.report.examples.test).
For every project with "production code" a test project exists with the default name settings.
The example is available on Github: junit-tools-testbench.
Run
After the installation and a restart from Eclipse the JUnit-Tools should be available. You can call the functions via
- the context menu in the package-explorer and the category JUnit-Tools
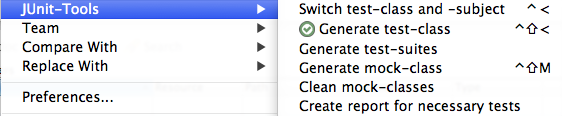
- the icon in the toolbar or

- the shortcuts
ctrl+shift+<(generates a test-class) andctrl+<(switches between the corresponding classes and methods).
To generate a new test-class select a java-class in the package-explorer or in the editor and click the icon for the JUnit-Tools in the toolbar or press ctrl+shift+<.
After executing the function the following wizard should be opened:

If a method was selected it is automatically checked in the wizard. For all new checked methods a test-method will be generated. If there are existing test-methods the corresponding methods are checked in the wizard. If you uncheck such methods, the corresponding test-methods will be deleted!